by Michelle Baragar | Jan 22, 2019 | GSuite
You will be glad to be reminded that this is an easy task.
- Launch the Chrome browser on your Windows computer
- Slide it off to one side so that it only takes up 1/2 your screen.
- Go to drive.google.com
- Log in
- Drag files off the desktop of your Windows computer onto the Chrome Screen showing your Google Drive
- The files will begin to upload to Google Drive
-
If my description above isn’t clear, here’s a video – fast forward to the 5-minute mark for a demonstration of the above steps.
Recommendation 1 – Create a file called “uploaded” on the desktop of your windows computer and once you’ve uploaded a folder/file place it in that folder called “uploaded” so that you don’t get confused if you have a ton of files.
Recommendation 2 – Pick up a flash drive or hard drive (Western Digital makes a good drive that is about the size of a deck of cards) and put all your Windows teaching resources (Word, publisher, SMART notebook files) onto this drive. Store it in a safe place.
My reasons for suggesting this are twofold. Firstly, we can’t know if somewhere down the road someone may write an extension for Chrome that will allow Chrome to read a Smart Notebook file.
Secondly, that content is yours, and while your windows computer will be returned this spring, maintaining the original files is not likely something you’ll regret. Finally, all schools will have a Windows computer in the office for teachers to use. So, should you require the ability to access one of those files, you will be able to do so.returned this spring, maintaining the original files is not likely something you’ll regret. Finally, all schools will have a Windows computer in the office for teachers to use. So, should you require the ability to access one of those files, you will be able to do so.

by Michelle Baragar | Jan 21, 2019 | GSuite
Make a new quiz & answer key
- In Google Forms, click Plus (+) .
- At the top right, click Settings .
- Click Quizzes -> Make this a quiz.
- Optional: To collect email addresses, click General -> Collect email address.
- Click Save
Make an answer key, assign points & add automatic feedback
You can make an answer key on certain question types:
Create an Answer Key
- To add a question, click “Add question” .
- Fill out your question and answers.
- In the bottom left of the question, click Answer key.
- Choose the answer or answers that are correct.
- In the top right of the question, choose how many points the question is worth.
- Optional: To add a written or YouTube video explanation to an answer, click Add answer feedback.
- Optional: To edit question or answer options, click Edit question.
Note: You can assign points and add feedback on all question types.
Choose what people see during and after the quiz
You can choose if people can see missed questions, correct answers, and point values.
- In Google Forms, open a quiz.
- At the top right, click Settings .
- Click Quizzes.
- Under “Respondent can see,” check the boxes next to the options you want.
Grade Quizzes
You can see automatic summaries for all quiz responses, including:
- Frequently missed questions
- Graphs marked with correct answers
- Average, median, and range of scores
Grade Individual Responses
If you collect email addresses, you can assign points and leave feedback on individual responses. After you grade each response, save your changes.
- In Google Forms, open a quiz.
- At the top, click Responses.
- Click Individual.
- To move between individuals, click Previous or Next .
- Find the question you want to grade.
- In the top right, enter how many points the response earned.
- Under the answer, click Add feedback.
- Enter your feedback and click Save.
- To save your changes, at the bottom, click Save.
See Quiz Results
- In Google Forms, open a quiz.
- At the top, click Responses.
- Click Summary.
Grade Question-by-Question
- In Google Forms, open a quiz.
- At the top, click Responses.
- Under “Responses,” click Question.
- To award points for a group of answers:
- Full points: click Mark correct .
- Partial points: enter the number of points you want to award.
- No points: click Mark incorrect .
- To add written or YouTube video feedback for a question, click Add feedback.
- To move between questions, at the top, click Previous or Next .
- When you’re done grading, at the bottom, click Save.
Send Results to Google Classroom
You can import grades all at once from Forms directly into Classroom’s Student Work page if you attach a quiz to an assignment.
If you import grades, all grades are imported. You can’t select some grades to import. Extended instructions can be found in Google’s Teacher Centre.

by Michelle Baragar | Dec 21, 2018 | Kami
As questions arise regarding Kami, I have begun to assemble some of the ins-and-outs into a Printable “handbook” that includes screenshots to try to assist. The handbook will be updated as new questions arise, but will only be as lengthy as the questions posed within CESD.
The handbook has been created in Google Slides…. so here’s a tip you may have forgotten – – when you build printables in Google Slides, you can change the size of the “slide” to be 8.5 X 11 (file -> page setup -> custom size) and voilà! You can easily create a booklet or any other printable, with a thumbnail view on the left side of your workspace! So, if you were a Publisher user, this is a quick way to regain some of the control of your layout!

by Michelle Baragar | Dec 20, 2018 | CESD Online Forms
It’s been lagging for some people. This could be the result of a few different things.
1. Too many tabs open – if you have 10-kajillion tabs open, things will slow down. (Google Keep is a great place to store websites that you don’t want to lose track of – just a tip there – as a teacher I often had many tabs open… stuff I’d discovered while searching for something else but didn’t want to lose…)
2. The download folder of your Chromebook could be full. Especially if you use Teachers Pay Teachers to buy resources. If you do that, download them, copy them into your Google Drive, then remove them from the downloads folder!
3. Your browser history (cache for those of you who are more my age category) may need to be cleared. To do that, click the 3 dots up at the top right of your screen (Where your profile photo is) and choose history. You’ll be taken to a screen such as . the image attached to this commentary. On the top left you can clear the browsing history.
So, in general, the usual things that can slow a computer down could be impacting your Chromebook. Test out the above three things if you’ve been having challenges with the field trip form!
by Michelle Baragar | Dec 20, 2018 | GSuite
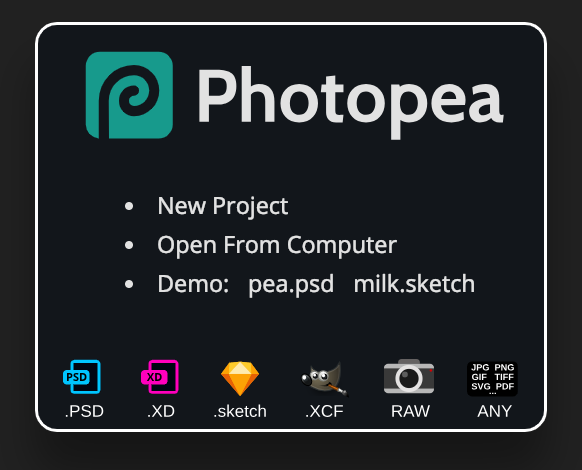
One of our brilliant tech EAs alerted me to the existence of Photopea today – https://www.photopea.com/ – The screen actually looks exactly like Photoshop, and while it lacks a few of the “bells and whistles” of photoshop (keyboard shortcuts, for instance), it would certainly be more than any student not enrolled in 30-level CTS courses would need!!